Accept the dialog and another dialog is shown, asking wether we want to add existing files. Since we are creating a new project from the scratch, click on 'no'.
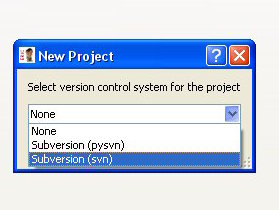
Another dialog is shown, asking if we want the project to be under VCS. We choose subversion (* See foot note). Click on 'Ok'.
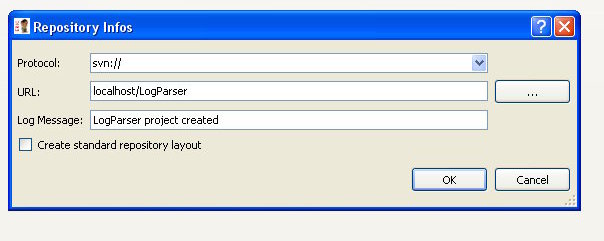
A new dialog is displayed, so we can set the repository properties.
We choose svn:// as protocol, for me the subversion server is located in localhost.
We'll put our sources in the LogParser repository directory (see next image).
We also type a log message ('LogParser project created' for instance).
We uncheck the Create standard repository layout field.
If we didn't, a layout with the directories 'trunk', 'branch' and 'tag' would be created.
Since our project is small and we don't expect a lot of people working on it and doing releases and branches all the time, a simple layout will do.
Be aware that even if you are the only developer working on a project, using a VCS is always a good idea.
This way you can always keep track of the changes you have done, and recover some feature you might have lost because of the changes you had made.
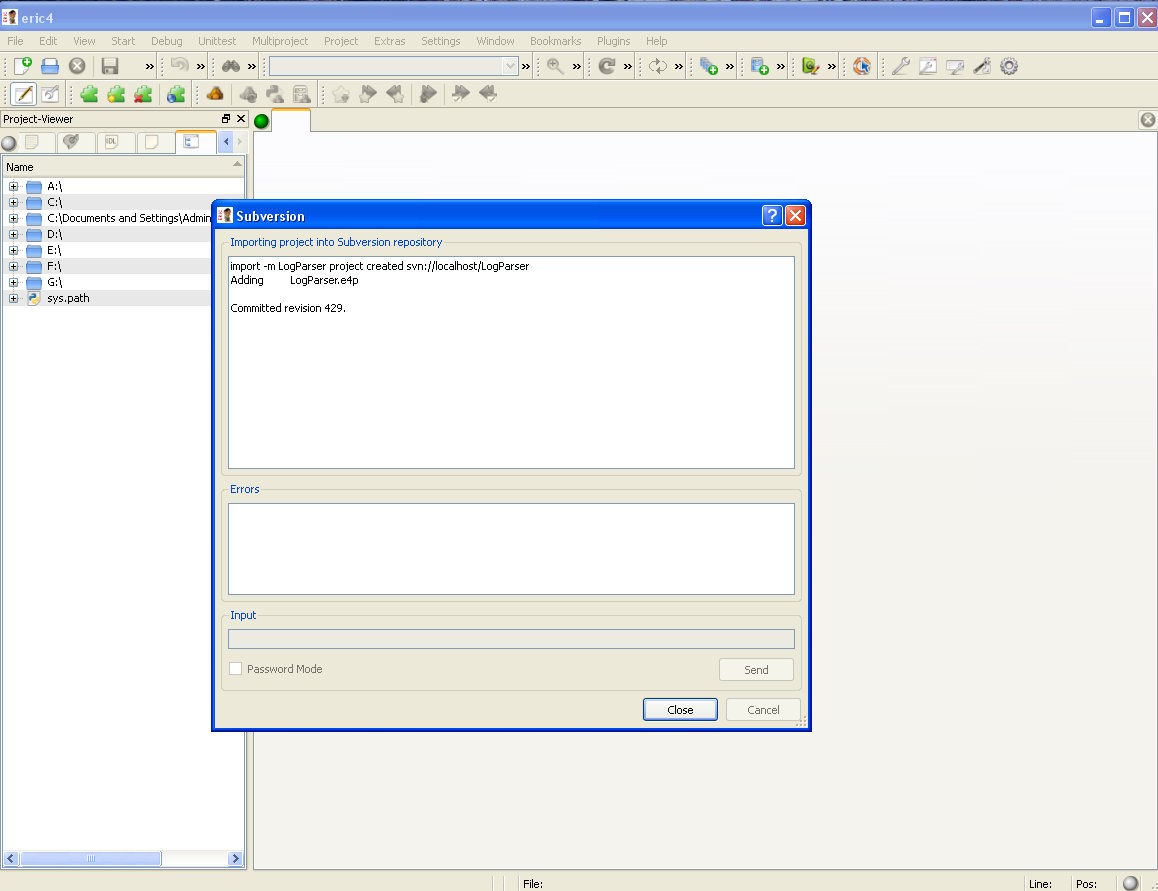
Yet another dialog is shown, asking wether you want to customize svn command options, just choose no.
Next, 3 dialogs will be shown displaying the results of the different svn commands to be executed: import, checkout and commit.
So far, we have created a new eric4 project, have also created it in the subversion repository, and we can start to work on it.